Data Verification - 5 Minutes Tutorial - API Integration
Prerequisites
The following information is required to be able to integrate with Authologic:
- Developer portal credentials,
- API Keys.
Developer Portal Credentials
The developer portal address and credentials were provided during onboarding.
Passwords And API Keys
During the onboarding you have received the API keys:
- API key allowing communication with Authologic.
- The key used to verify the data sent by Authologic by the callback mechanism.
Integration Overview
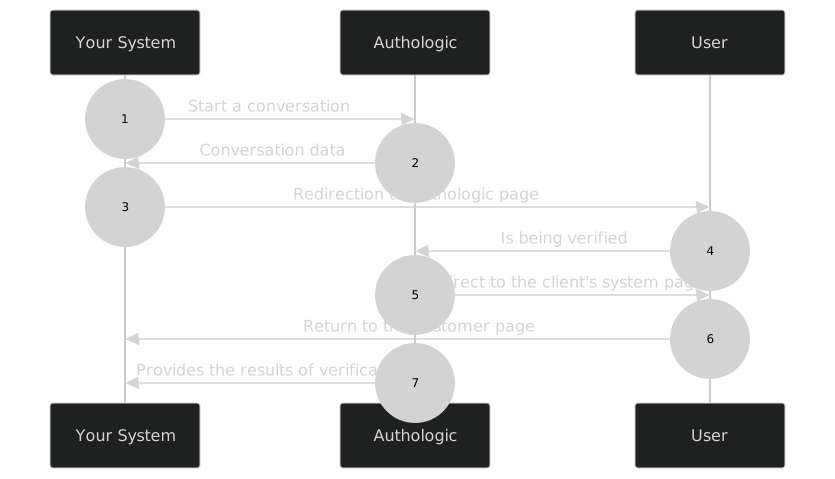
The entire process is called conversation. The following diagram represents the process logical flow:
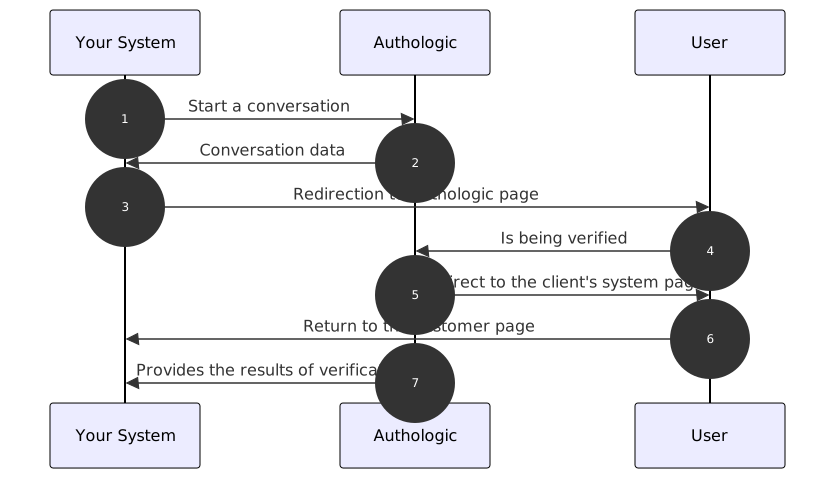
- Start of the identity verification process. Your server calls the API method called: POST /api/conversations
- The response returns information about the address to which the user should be redirected
- Your system redirects the user's browser to the above URL
- The user verifies himself
- Authologic redirects the user's browser to a predefined page of your system
- Your server displays the return page
- Authologic calls a callback on your server's side with the result of the verification
curl tool to show the API operation.
If you have not dealt with it, you can find a short guide on it here(opens in new tab).
Of course, there is nothing to prevent you from using the swagger tool directly, which you will find at the
link: here,
or any other tool, such as Postman or Insomnia.Creating a Conversation
In order to use the data verification product, a conversation must be created. In this
example we will use two products together - the verify and identity. When using the verify product it
is necessary to specify which lists should be checked and provide the data that should be checked. Example:
Basic Auth based authentication described, among others, at
here(opens in new tab). Username and API key should be used as data.
By using the curl tool we use the -u option which is responsible for the use of Basic Auth.curl -X POST -u my_login "https://sandbox.authologic.com/api/conversations" \
-H "accept: application/vnd.authologic.v1.1+json" \
-H "Content-Type: application/vnd.authologic.v1.1+json" \
-d '{
"userKey": "7dfb9ded-c38f-49ae-95e2-307283a0b1f6",
"returnUrl": "https://id.sandbox.authologic.com/c/{conversationId}/thankYou",
"callbackUrl": "my_callback_url_here",
"query": {
"identity": {
"requireOneOf": [
[ "PERSON_NAME_FIRSTNAME", "PERSON_NAME_LASTNAME"]
]
},
"verify": {
"user": {
"person": {
"name": {
"firstName": "Jon",
"lastName": "Testowy"
}
}
}
}
}
}'
Of course, instead of my_login enter your login. You should be prompted for a password - at that point you should
enter the API key (do not confuse it with the password to the customer panel).
For my_callback_url_here you could use https://webhook.site/(opens in new tab) to generate callback url which will be responsible for
receiving user information from Authologic. Whether you will use webhook.site or other similar tool it is crucial
that it will correctly receive http request since it is required for the process of identification.
The transaction defined this way, in response to its status, has an additional section:
{
  "id": "c12c1adc-3ff0-4d32-b95c-c593135c903e",
  "userKey": "7dfb9ded-c38f-49ae-95e2-307283a0b1f6",
  "url": "https://sandbox.authologic.com/c/c12c1adc-3ff0-4d32-b95c-c593135c903e",
  "status": "CREATED",
  "result": {
    "identity": {
      "status": "IN_PROGRESS",
      "user": {}
    },
    "verify": {
      "status": "IN_PROGRESS"
    }
  }
}
Note: status behaves identically to the identity section.
End of Conversation
After the end of the conversation, information about the result of the comparison is displayed in the section containing the result of the action:
{
  "id": "c12c1adc-3ff0-4d32-b95c-c593135c903e",
  "userKey": "7dfb9ded-c38f-49ae-95e2-307283a0b1f6",
  "url": "https://sandbox.authologic.com/c/c12c1adc-3ff0-4d32-b95c-c593135c903e",
  "status": "FINISHED",
  "result": {
    "identity": {
      "status": "FINISHED",
      "user": {
        "person": {
          "name": {
            "firstName": "Jan",
            "lastName": "Testowy"
          }
        }
      }
    },
    "verify": {
      "status": "FINISHED",
      "reliability": 0.6666666666666667,
      "details": [
        {
          "field": "PERSON_NAME_FIRSTNAME",
          "reliability": 0.6666666666666667
        },
        {
          "field": "PERSON_NAME_LASTNAME",
          "reliability": 1
        }
      ]
    }
  },
  "info": [
    {
      "country": "PL",
      "method": "PSD2"
    }
  ]
}
As you can see in the example, the answer contains a numeric measure of the fit of the data, on a scale of 0 (other data) to 1 (100% match). It also includes a comparison for each field separately.