User Authentication - 5 Minutes Tutorial - Java SDK
Prerequisites
The following information is required to be able to integrate with Authologic:
- Developer portal credentials,
- API Keys.
Developer Portal Credentials
The developer portal address and credentials were provided during onboarding.
Passwords And API Keys
During the onboarding you have received the API keys:
- API key allowing communication with Authologic.
- The key used to verify the data sent by Authologic by the callback mechanism.
Integration Overview
The entire user authentication process comes down to three steps:
- Sending to Authologic notification what data you want to get and what products you will use
- Redirecting the user to a unique address returned by Authologic
We have called the entire process 'conversation'. In the picture, the process looks like this:
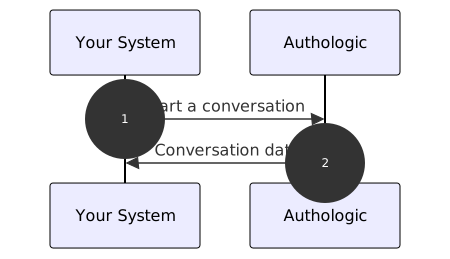
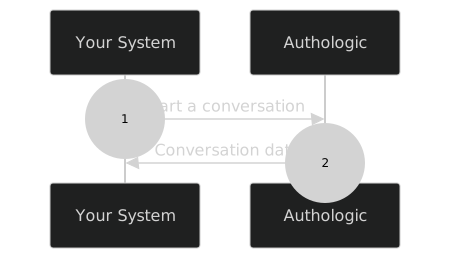
- Start of the identity verification process. Your server calls the API method called: POST /api/conversations
- The response returns information about conversation identifier and status
One API for multiple online identity verification methods written in Java.
Installation
The installation of the library is as simple as including it as one of the projects dependencies.
We encourage to use the newest version of the library as we are constantly expanding our product offering and the underlying functionalities.
Maven
Include the following dependency in your pom.xml file to use Authologic Java SDK:
<dependency>
    <groupId>com.authologic.client</groupId>
    <artifactId>authologic-client</artifactId>
    <version>0.2.42</version>
</dependency>
Gradle
Include the following dependency in your build.gradle file to use Authologic Java SDK:
implementation("com.authologic.client:authologic-client:0.2.42")
Usage
The following example demonstrate an example on how you can use the Java SDK to interact with the Authologic APIs.
Creating Conversation
To start a new conversation process, which is the main entry point for the auth product the following example can be used:
import com.authologic.client.api.*;

import java.util.Arrays;

public class Main {
    public static void main(String[] args) {
        Client client = ClientBuilder.builder("username", "password").sandbox().build();

        Conversation conversation = client.execute(
            Requests.
                createConversation().
                addProduct(
                    new AuthProductQueryBuilder().addChallenge("challenge")
                )
        ).get();

        ConversationAuthResult authResult = conversation.getResult().getAuth();

        System.out.println("Status: " + authResult.getStatus());
        System.out.println("Token: " + authResult.getToken());
        System.out.println("Challenge: " + authResult.getChallenge());
    }
}
Creating the Client Instance
We start by creating the Client instance:
Client client = ClientBuilder.builder("username", "password").sandbox().build();
API credentials can be generated via OmniPanel.
Because the API is secured you need the provided credentials to be able to interact with it.
Once initialized the Client instance may be used to interact with the Authologic API.
Creating the Conversation
Next we can create the conversation and request the first and last name of the person we are
requesting the authentication for. For that purpose we use the Requests.createConversation()
using the following code snippet:
Requests.
    createConversation().
    addProduct(
        new AuthProductQueryBuilder().addChallenge("challenge")
    )
The product that we want to use is the auth product, which allows us to specify the challenge that is used by the authentication method.
As the result an instance of the ConversationAuthResult is created and will contain the status of the
execution, token and challenge depending on the authentication provider. We can use the mentioned object
to read those values:
ConversationAuthResult authResult = conversation.getResult().getAuth();

System.out.println("Status: " + authResult.getStatus());
System.out.println("Token: " + authResult.getToken());
System.out.println("Challenge: " + authResult.getChallenge());